What are Pre-Trip Requests and Travel / Cash Advances?
What are Pre-Trip Requests and Travel / Cash Advances?
What is it?
The Concur Request module is used to facilitate advance approval of travel and expenses related to the following situations:
- A Pre-Trip Request is required for all Students in order to be reimbursed for travel expenses. Some schools and departments may also require approved pre-trip requests for all travel. If you are required to obtain pre-trip approval, you will not be able to submit an Expense Report without the pre-trip approval attached.
- You may request a Travel Cash Advance to cover out-of-pocket, incidental expenses that cannot reasonably be charged to a credit card. An advance should be requested within a reasonable period of time (10 to 20 days) before the trip and must be reconciled in an Expense Report after travel.
- A Non-Travel Expense Cash Advance may be requested to support start-up or operational costs on an intermittent or ongoing basis.
- If you are required to submit a Pre-Trip Request in order to be reimbursed for travel expenses, you may submit a Pre-Trip Request with Advance, if a Travel/Cash Advance is needed.
Refer to the Travel Expense Policy and the Cash Advance for International Operations Policy for more details.
Who’s it for?
Concur Travelers who are required to submit Pre-Trip Requests or have a need to request a Travel / Cash Advance.
How do I do it?
Please refer to Submitting a Pre-Trip Request in Concur video or Submitting Pre-Trip and Travel / Cash Advance Requests Job Aid for detailed instructions. To create a Pre-Trip Request or Travel/Cash Advance:
1. Click the Requests tab and click Create New Request.
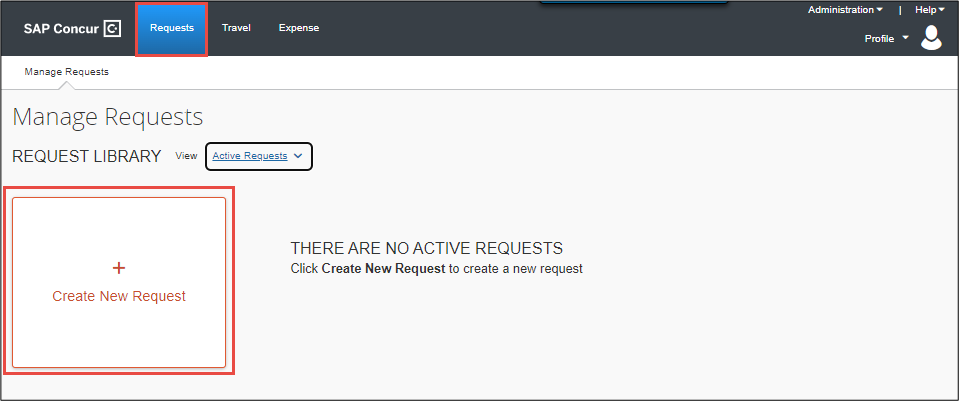
The Create New Request Details screen appears.
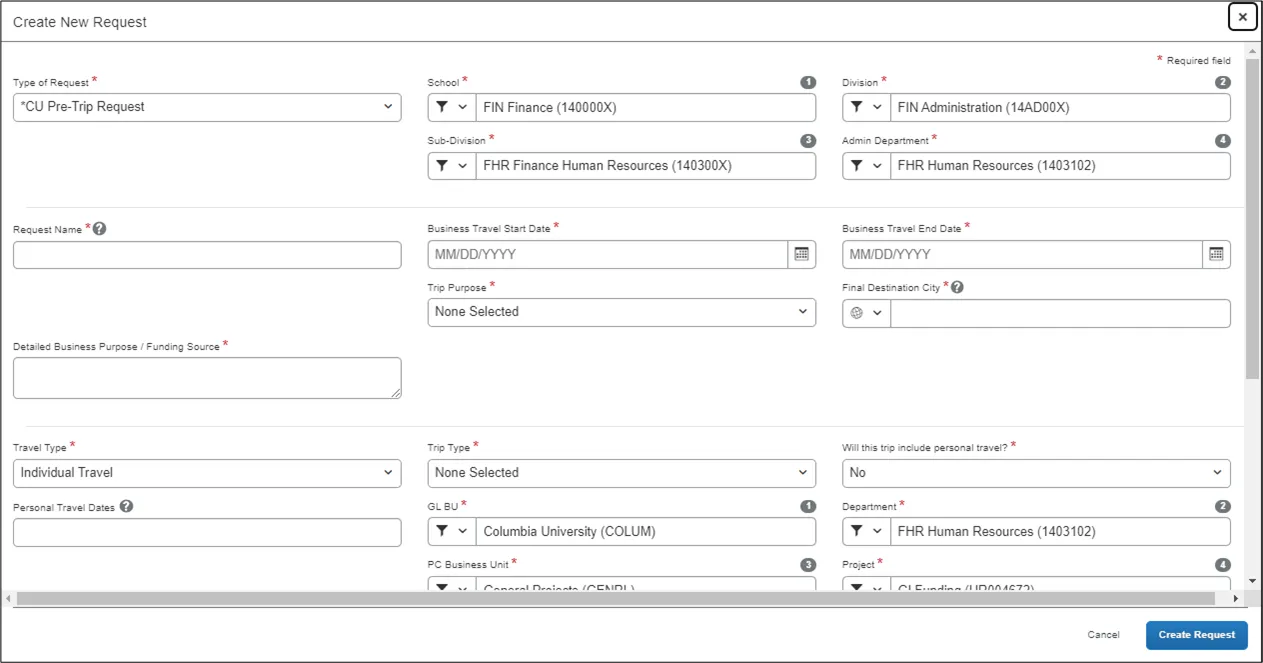
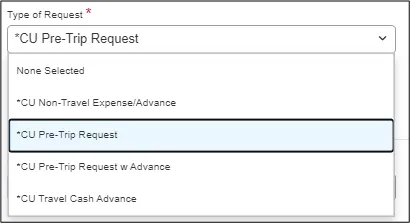
2. Select the correct Type of Request from the dropdown.
If you require a Cash Advance, be sure to select either CU Travel Cash Advance, CU Pre-Trip Request w Advance, or CU Non-Travel Expense/Advance.
3. Complete the required Request Header fields and click Create Report. The Expected Expenses list appears.

4. Click the Add button to add expected expense items. The Add Expected Expense screen appears.
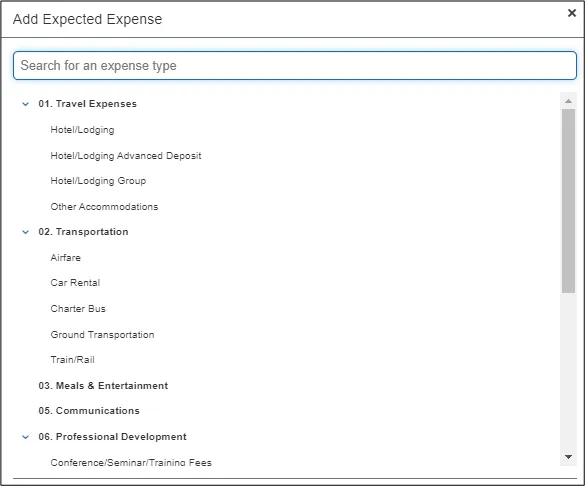
5. Search and select the type of Expense Type. The New Expense screen appears.
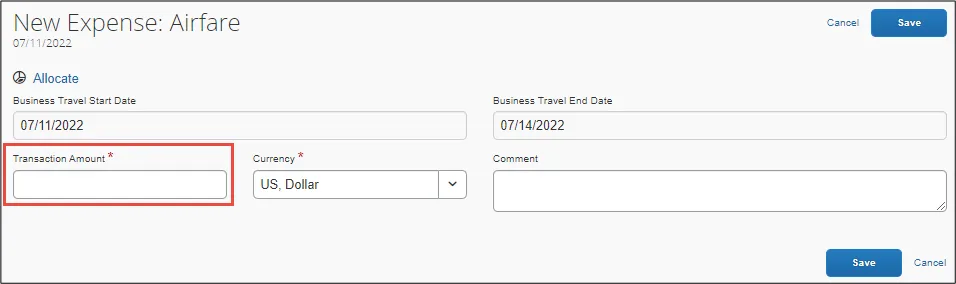
6. Enter the anticipated Transaction Amount and any Comments, if needed.
7. Click Save. The Expected Expense appears in the list.

Repeat steps 4 through 7 for any other Expected Expense.
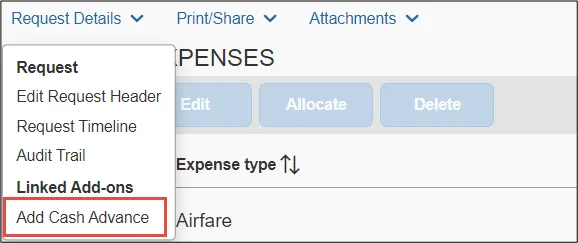
8. If you are requesting an advance, click the Request Details menu and click Add Cash Advance to enter the advance amount, which must not exceed the amount of the anticipated expenses.
9. After entering all Expected Expenses, click Submit Request.